Laboratory products
It Depends on the Accuracy
Jul 15 2008
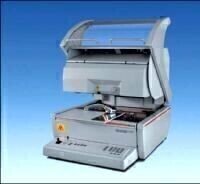
Fischer, the Fischerscope® X-RAY XDVM®-P, you can determine the thickness and composition of coatings non-destructively and contact-free. The XDVM®-P is aimed at demanding applications in electroplating
companies with high production volume, for example, the control of high-tech printed circuit boards with narrow tracks which especially require precise positioning of the measurement spot. The user only has to position the part to be measured on the XY(Z)-measurement stage. At high speed, the measurement stage moves from the loading position into the measuring position. Fast specimen changing is a major advantage of this instrument.
On his screen the user can view the coloured video image, zoom in up to a 180 times enlargement. With a joystick he can position the primary X-ray beam easily and accurately on to the measurement spot – better than a 5 ìm resolution to be exact.
X-radiation? Do not worry, the fully protected chamber safely avoids any
radiation leakage. Therefore, no radiation protection agent is required. Changeable collimators can focus the measurement
beam so that the smallest measurement spot sizes, from profiles of 0.3 mm x 0.7 mm, are possible – ideal for positioning on the narrow tracks of printed circuit boards, contact stripes or soldering pads for instance. Only Fischerscope X-ray measurement instruments are designed in such a way, that the video view is exactly vertically above the measurement spot.
Because of this, the user is able to control the measurement process easily and precisely. Programmable measurement actions are also possible. This feature is used to advantage by manufacturers of
printed circuit boards for instance who measure on very fine surface structures. In a matter of seconds the programme is available. Above all, technicians in measurement technology appreciate the varied and practical functions, high accuracy of the results and ease of use of
the software, WinFTM® V.6, which also provides further statistical evaluations of the results. Stored printed forms can be retrieved, so that a complete measurement protocol, inclusive of video image and a
company logo can be printed out.
WinFTM® V.6 BASIC is able to determine up to 24 individual characteristics concerning coating thickness and element concentration
simultaneously at one measurement.
Very thin coatings down into the 10-nanometer-range are measurable. The
measurement accuracy can be increased to a maximum by using up to 64 calibration standards per application.
Digital Edition
ILM 50.2 March 2025
March 2025
Chromatography Articles - Effects of small deviations in flow rate on GPC/SEC results Mass Spectrometry & Spectroscopy Articles - Waiting for the present to catch up to the future: A bette...
View all digital editions
Events
Mar 17 2025 Milan, Italy
Mar 18 2025 Beijing, China
Mar 20 2025 Brussels, Belgium
Mar 20 2025 Chandigarh, India
ACS National Meeting & Expo, Spring 2025
Mar 23 2025 San Diego, CA, USA


